
“The Devil is in the Details”
Making something from a pattern has its challenges, but it’s generally a safe bet. For me, designing something from scratch typically has an “Oh bleep” moment when I realize that I have failed to consider some major detail.
After I finished my first graphghan pattern, The Daisy Pillow, I assumed that I had worked out all of the kinks involved in making a graphghan. But, we all know what happens when you assume, don’t we?
As I sat down to create The Beloved Black Dog Blanket pattern, I made my gauge swatch using double crochet stitches. Typically, graphghans are made using single crochet stitches, but I wanted the finished blanket to feel more soft and drapey. I also dreaded the thought of how long it would take me to make a blanket using tiny, single crochets. It didn’t occur to me to think about why graphghans are usually made with single crochet stitches.
Unfortunately, the devil is in the details. As I sat down and excitedly began crocheting the blanket, I realized why single crochets are used in graphghan designs. Instead of smooth transitions between colors, the extra height of the double crochet stitches made the color changes stand out and created a rough edge. Not a good look.
My cheeks flamed with embarrassment when I realized my mistake. It had taken me hours to design the pattern on Stitch Fiddle, and I really didn’t want to start over from scratch. Rather than give up, I decided to see if I could MacGyver a blended double crochet color change and save the day. With a little bit of trial and error and some luck, I came up with a method that worked really well.
I’ve included photos and instructions for making blended color changes using double crochet stitches with The Beloved Black Dog Blanket pattern, which is available in the DaisyGardenCrochet Ravelry Store. I also want to share them here for anyone who finds themselves in my situation and is desperately searching the internet for a solution.
In the meantime, I’m off to work on my latest design. I always worry about making big mistakes, but the joy I get from creating a successful design is so worth it. Dolly Parton said it best, “The way I see it, if you want the rainbow, you gotta put up with the rain!”
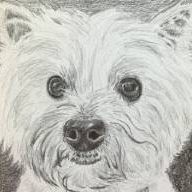
Step 1: As you complete the last double crochet stitch in the working color (blue in this example), stop right before the last yarn over step.
Step 2: Remove the loop closest to the hook and bring the working color (blue in this example) from the back of the work to the front of the work by bringing it over the top of the yarn between the 2 loops.
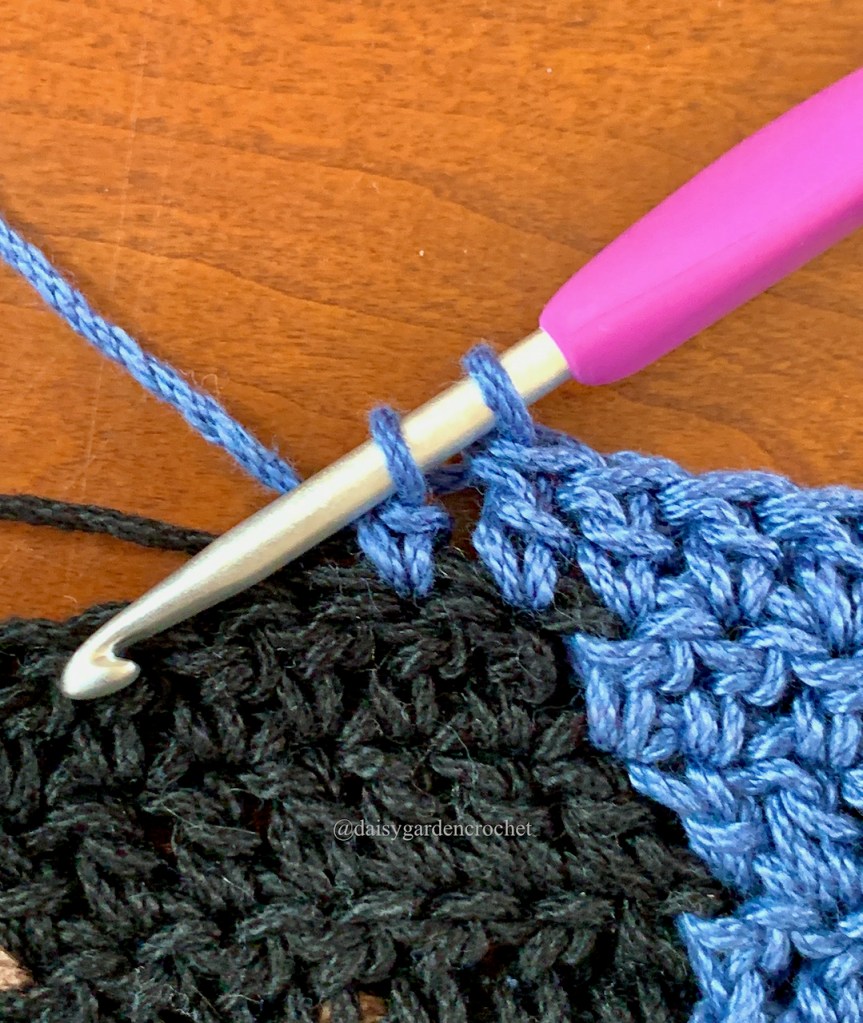
Step 3: Put the loop back onto the hook. The tapestry needle shows that the blue yarn is now positioned underneath the hook and to the front of the work allowing for a well-blended color change on the next row.
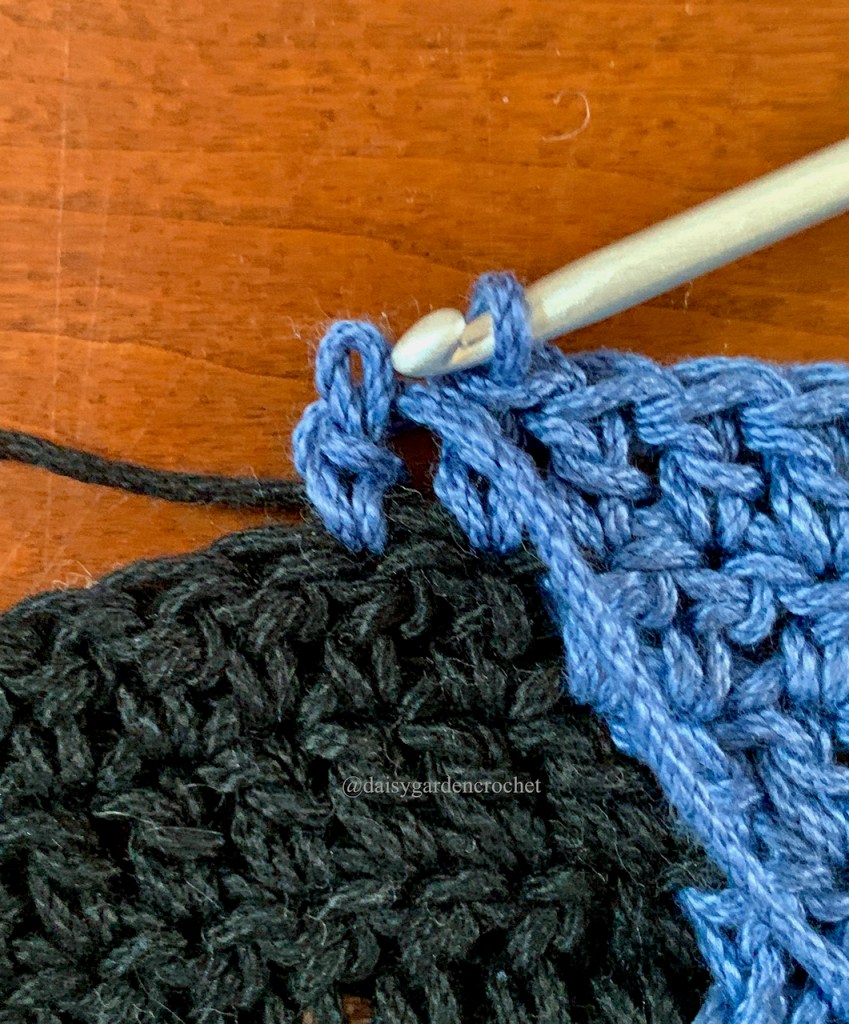
Step 4: To complete the color change, finish the double crochet stitch using the new color (black in this example).

