

Doesn’t the Lavender Laundry Basket make you want to do laundry? Okay, no it doesn’t, but it certainly ended up looking really pretty. I first saw the pattern for the Color Block Baskets on the old Red Heart website, now Yarnspirations.com, and I had to make one. The basket pattern comes in a small and a large size, so I started with the large size and made it even bigger because I knew that I wanted to make a basket large enough to use as a laundry tote. You can find the instructions for how to adapt the pattern to make the Lavender Laundry Basket at the end of this post. Truth be told, I did struggle at first with getting this pattern going, but was lucky enough to find an excellent tutorial on the Marly Bird YouTube channel that finally got me on the right track. The only thing that I didn’t realize before starting the basket was that it wouldn’t be stiff sided even though the pictures on page 2 of the pattern clearly show how easily it folds. Here’s a photo to illustrate how it is completely collapsible.
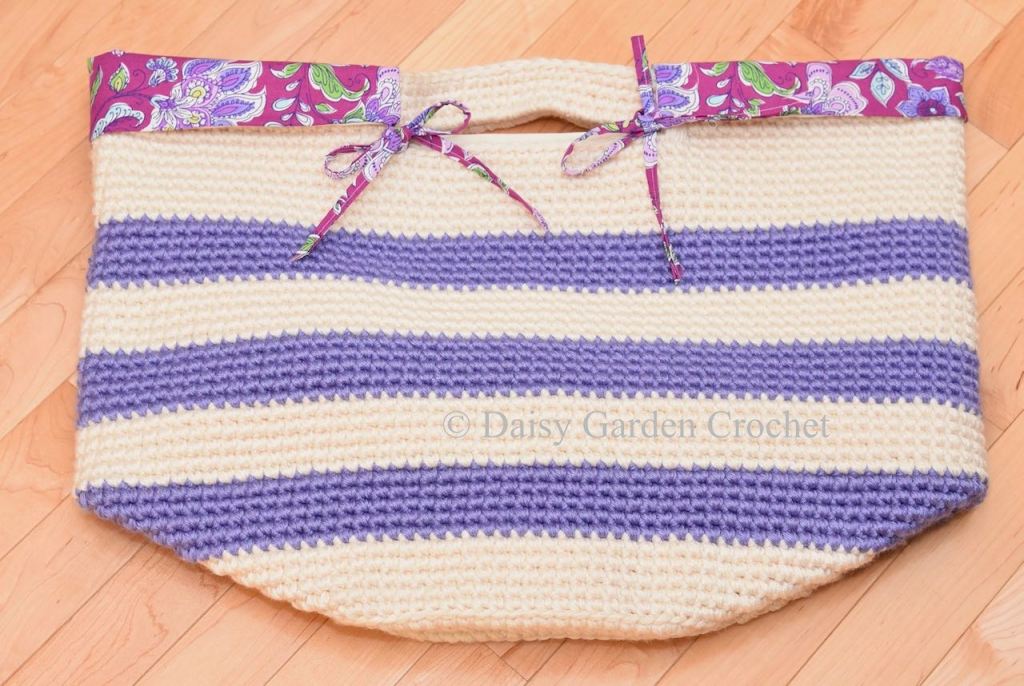
I also upgraded the basket by adding a double-sided fabric liner for practical and design reasons. Since I wanted to use the basket for actual laundry, the washable cotton liner will protect it from stains and odors. From a design perspective, I thought that the purple butterfly fabric was amazing, and it really added a bright and cheerful look. Deciding to make the liner was easy; actually making it was much harder for me. I can definitely use a sewing machine, but unlike crochet, sewing stresses me out completely. Crochet is pretty forgiving when you make a mistake. Just pull out the yarn and start over. While you can absolutely fix a sewing error with a seam ripper, I’ve found that to be difficult, and it often leaves me with damaged fabric. For me, crochet is a stress reliever, and sewing is a stress inducer. But that fabric was fabulous, so I dusted off my machine and went online to search for help.
Thank goodness for the internet. Ask and you shall receive! Lucky for me, Audrey and Diane at TheClothParcel.com posted an excellent and detailed blog post describing how to make a laundry basket liner. Since the gaps in the crochet stitches making up the basket allowed the purple butterfly fabric pattern to show through, I used a neutral cream color fabric for the outer liner and the purple butterfly fabric for the inner liner. The inner liner is what is visible when it is folded over the edge of the basket. It was hard to keep my brain wrapped around that inner/outer difference, but I figured it out eventually. Because I was flying by the seat of my pants in making the liner, I don’t have any additional instructions for you other than I did write down that I made the ties a bit thinner. Don’t worry, the blog post instructions are well done with lots of helpful pictures, so you should be in good hands with Audrey and Diane.
Instructions
Color Block Basket Pattern
I used Red Heart Soft yarn in Off White for the cream color. This yarn has the advantage of having no dye lot, so I just bought the yarn as needed although you need at least 3 skeins to start with because the basket is made by holding 3 strands together. The pattern does give you an idea of how much total yarn you will need to make the large basket keeping in mind that the Lavender Laundry Basket will be even larger.
I used Caron Simply Soft yarn in Lavender Blue for the stripe color. This yarn also has no dye lot, so you can buy it as needed, but I think that I only needed 3 skeins and had some leftover at the end of the project.
To make the base of the basket, I followed the directions all the way through the 14th round of the large basket instructions and then continued for a total of 20 rounds and 120 single crochet stitches. For me, the base was the hardest part to make because of the counting. Something always seems to interrupt me mid count, so using a stitch counter is really helpful.
For the sides of the basket, I started with 5 rows in the Off White color followed by 5 rows of the Lavender Blue color with each set of 5 rows measuring approximately 2 inches. I continued alternating colors until I finished the third lavender stripe. After completing the third lavender stripe, I crocheted 7 rows in Off White and then modified the Handles portion of the pattern as follows:
Handles (120 single crochet base size)
Chain 1
Single crochet (sc) in the first 20 stitches
Chain 20
Skip the next 20 stitches
SC in the next 40 stitches
Chain 20
Skip the next 20 stitches
SC in the next 20 stitches and join with a slip stitch
After establishing the handle for my larger version of the basket, I continued following the pattern instructions for a total of 4 rounds for the handle. The pattern called for a total of 3 rounds, but I thought that looked out of proportion for the larger basket. You can certainly make that call based on what looks better to you. To reinforce the handles to make sure that hauling laundry didn’t cause the crochet stitch where each handle meets the basket to break, I reinforced the stitch by looping some stitches in the cream color several times around the joining point. I didn’t have any guide, so I just MacGyvered it trying to make it sturdy while still looking good.
Good luck making the Lavender Laundry Basket, or even better, have fun picking out different yarn and fabric and designing a basket of your own.
